Steps to create a chat inbox for the Gmail account #
Open the ‘Inboxes’ section #
Please, navigate to the ‘Chat’ on the left-side menu. Once the page is open, please click on the ‘Inboxes’ on the top menu bar.

Click on the ‘Add Inbox’ button

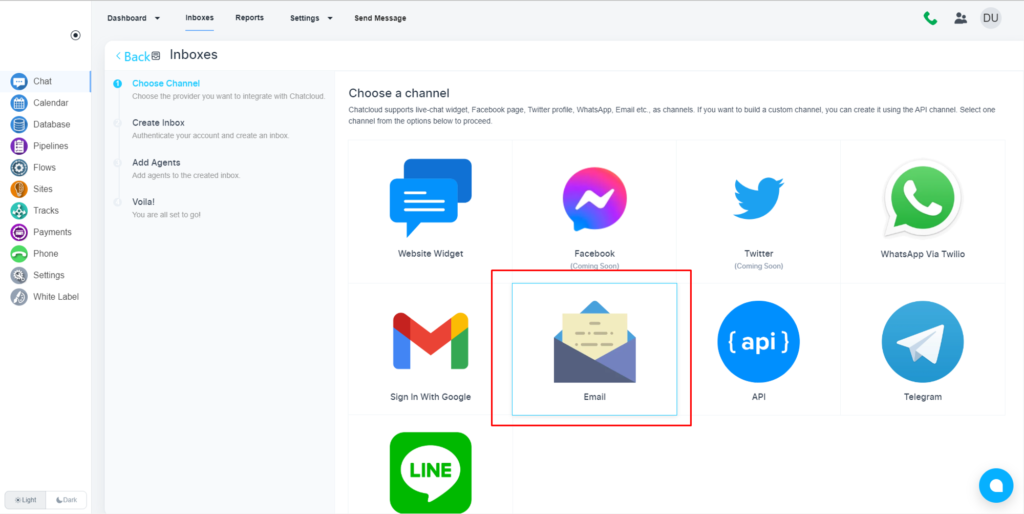
Choose the inbox type #
Please, choose the ‘Email’ option
Configure the inbox #
Please, set a channel name, and the email address

Please, click on the ‘Create Email Channel’ button.

Select a system user as an agent
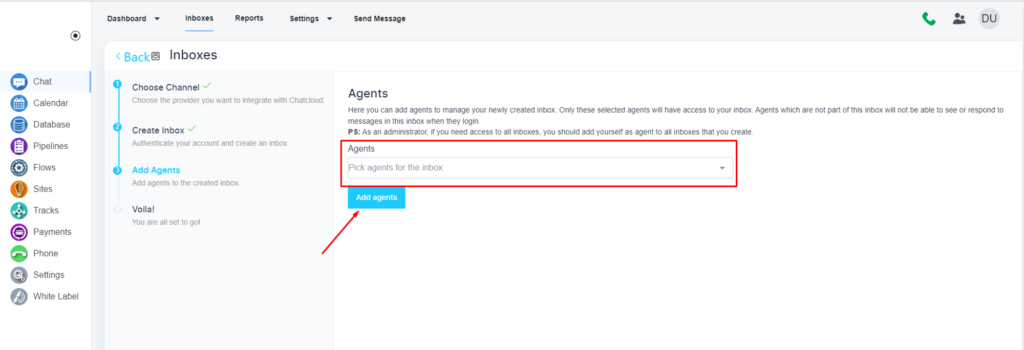
and click on the ‘Add Agent’ button
Please, click on the ‘More Settings’ button

Enable the ‘SMTP’ feature #
Please, click on the ‘Settings’ tab and enable the ‘SMTP’ configuration

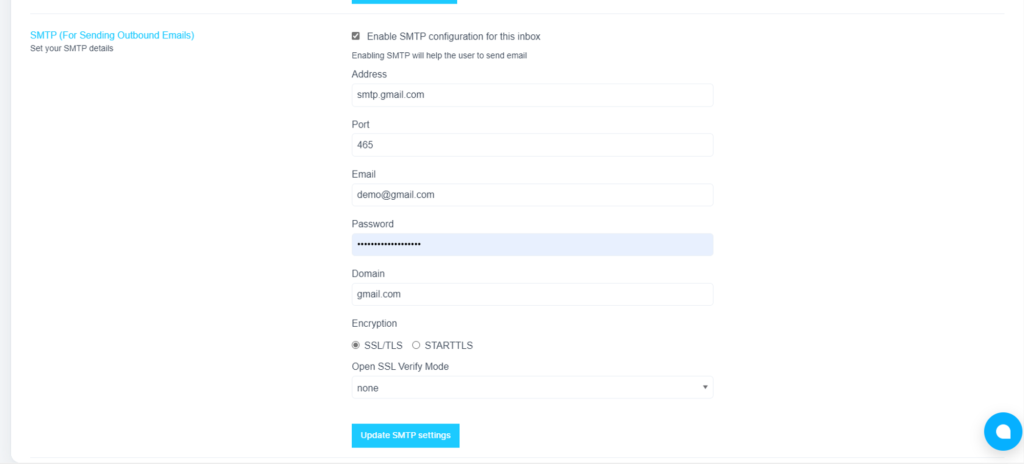
Configure the Gmail SMPT #
Please, use the flowing details
Address: smtp.gmail.com
Post: 465
Email: Your email address
Password: Your email password
Domain: gmail.com
Encryption: SSL
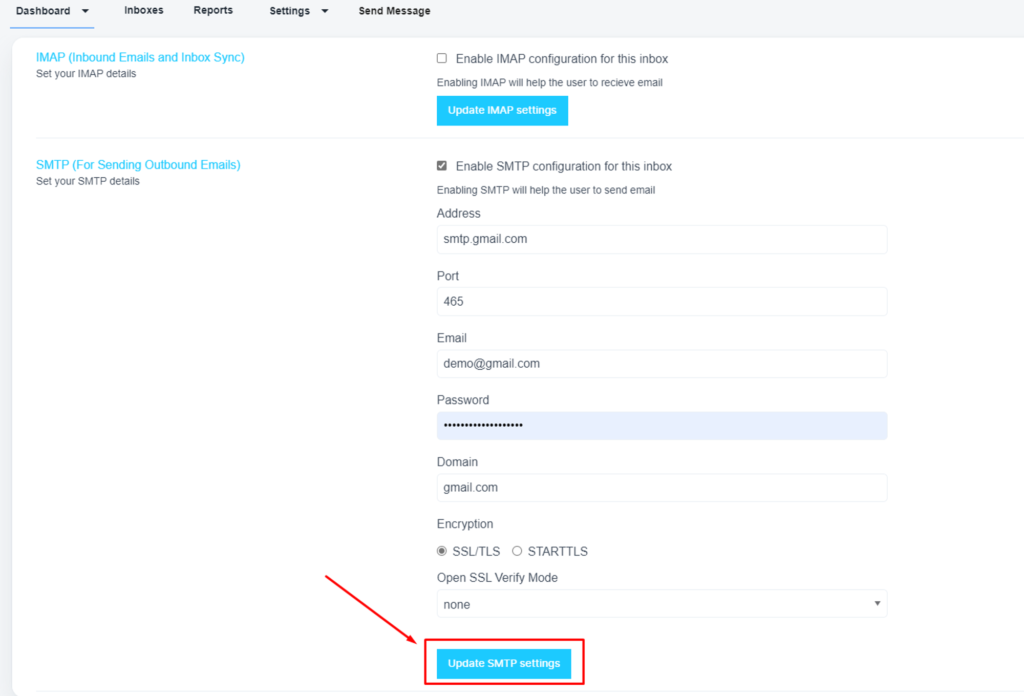
After configuration, please click on the ‘Update SMTP Settings’ button
💡 If you use 2-step verification on your Google account and your mail client doesn’t support verification codes, you’ll have to enable App Passwords
Steps to set up APP Password #
Go to your Google Account and choose Security on the left panel.
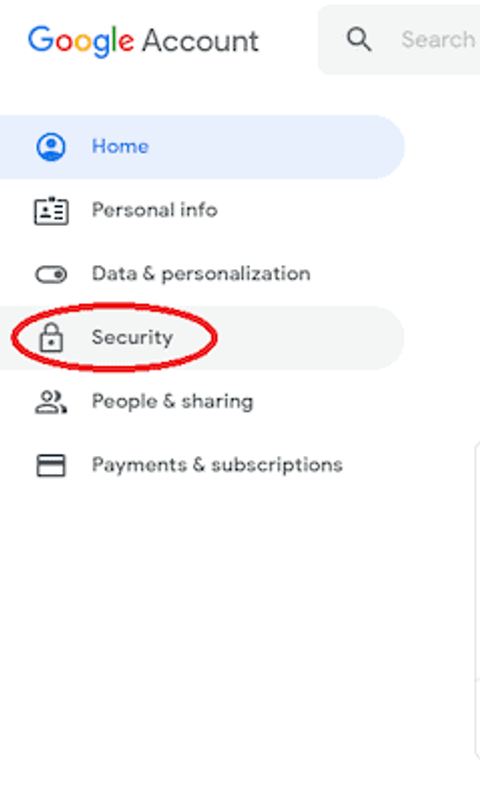
On the Signing in to Google tab, select App Passwords.

If you don’t see this option, it might mean that:
- Two-step verification is not set up for your Google account.
- Two-step verification is set up for security keys only.
- Your account is used through work, school, or another organization.
- You’ve turned on Advanced Protection for your account.
Click on Select app and pick the app you’re using.
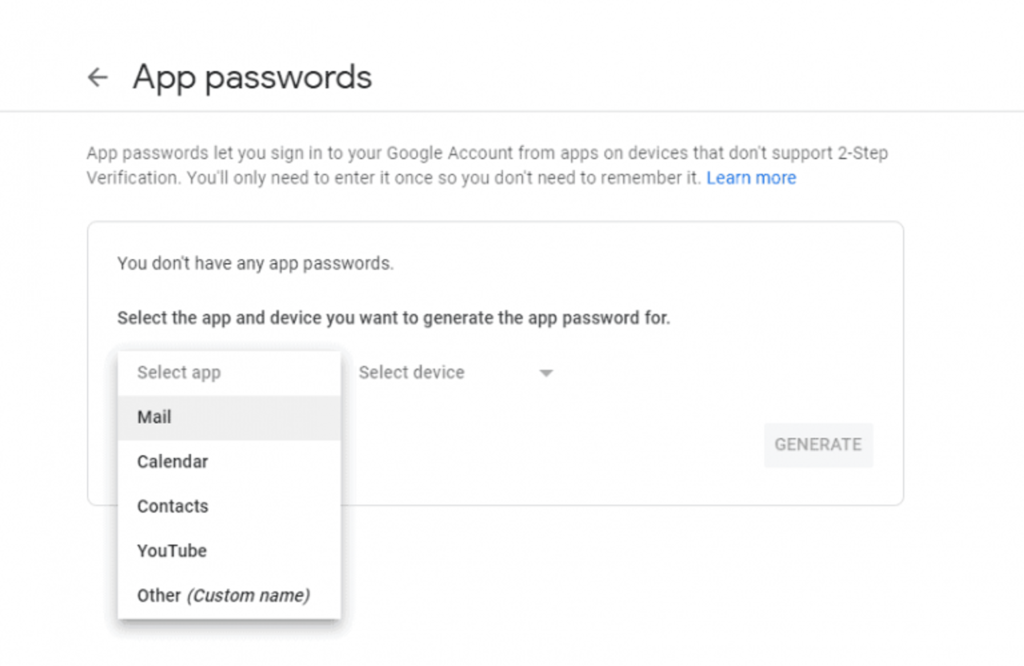
Click on Generate.
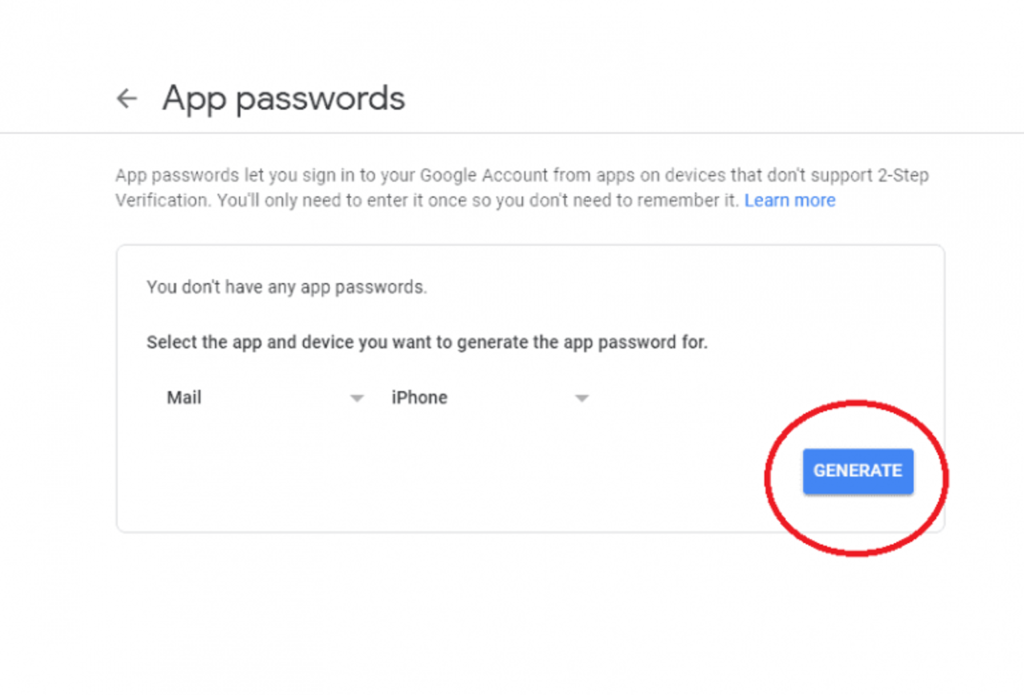
Follow the instructions to enter the App Password.
The App Password is the 16-character code in the yellow bar on your device.
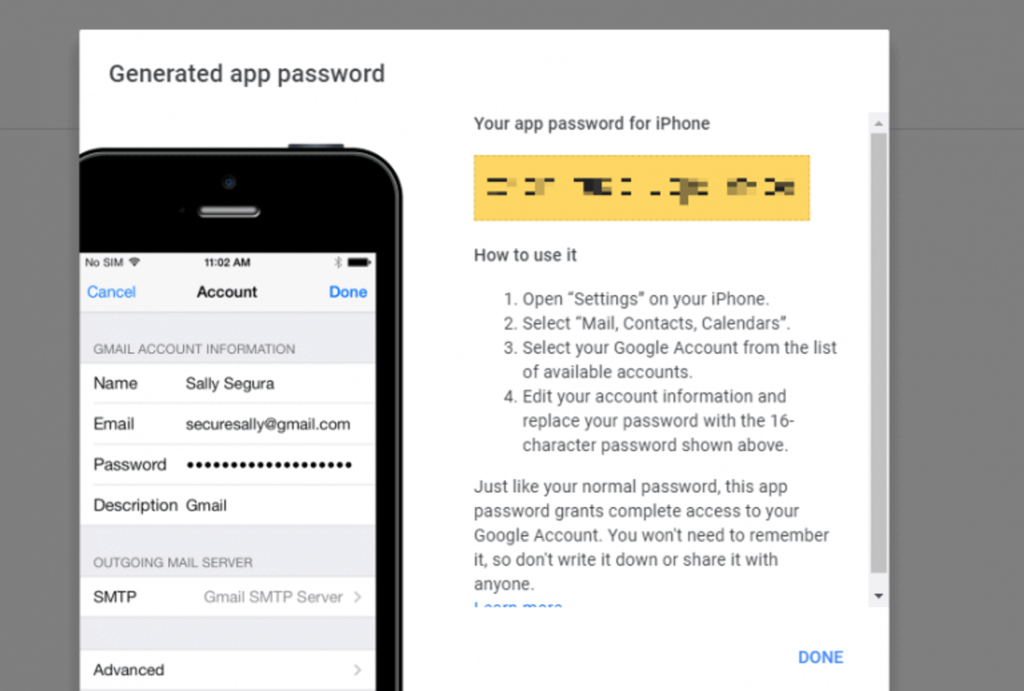
Click on Done.
💡 You won’t have to remember your App Password since you’ll probably use it just once to connect your account to the app.


